Bringing Natural Nutritional Energy to Life OrmusMinerals.com
The Lye Burn Method(a.k.a. "Lye Fusion")by Joe Lello IntroductionMost would agree that the pinnacle of ORMUS production techniques would have to be the classic sodium burn method, introduced to us by an individual whom, for purposes of the Internet, prefers to remain known only as The Essene. The sodium burn method is quite effective at disaggregating metals, but it unfortunately requires the experimenter to handle a fairly spirited if not downright dangerous substance - namely elemental sodium metal. Sodium metal itself is both caustic and toxic, but much more problematic is the fact that elemental Sodium spontaneously breaks down water into its component parts, Hydrogen and Oxygen, immediately upon contact. This reaction occurs so quickly and so violently that it produces a great quantity of heat, which more often than not ignites the highly flammable Hydrogen gas, and that Hydrogen gas then burns even more fiercely due to the presence of all that free Oxygen. If a large enough quantity of sodium metal is involved, sufficient heat may be generated by these burning gases to reach a temperature where the sodium metal itself may then ignite - and now you've got some serious fireworks on your hands! While elemental sodium metal can be safely handled with the use of a little common sense, it is possible to attain results rivaling those of a sodium burn, by utilizing a much tamer substance - namely the hydroxide of sodium, more commonly known as lye. This process has come to be known as a "lye fusion" or lye burn. It works well with black volcanic sand and it works very well with copper metal. Unfortunately it has not proven very effective with gold metal, however when you consider that the cost of a pound of sodium metal is roughly $150 vs. an 18 oz. container of lye at three dollars and change - it makes pretty good sense to save the sodium metal for use with gold or other precious metals. It has been stated that Red Devil brand lye is almost as pure as reagent-grade sodium hydroxide. Others claim that it contains contaminates. The author knows of at least a dozen people who have been using Red Devil lye in their alchemical Workings and ingesting the end products for years, and they are all still alive and kicking - but if you are a perfectionist and worried about every part per gazillion of contaminates, lab-grade sodium hydroxide is readily available, of course at a significantly higher cost. Perhaps this is also a good time to mention another controversy: that of glass vessels vs. boiling lye. For all of you self-proclaimed scientific geniuses out there who are so fond of pointing out that boiling lye reacts with glass, the author has used the same Pyrex glass boiling crucible at least 25 times now with no appreciable signs of attack other than a fine white film on the inner surface of the crucible, and that is only in some spots. The ancient alchemist had no such advantage as corrosion-resistant borosilicate glassware to work with, yet somehow they got the job done without perishing. It is this author's opinion that, especially for a beginner, the advantages of being able to see and more precisely control the boiling process far outweigh any "danger of contamination" from lye attacking the glass. Nuts and BoltsThe lye fusion method is a relatively straight-forward procedure. If you can afford it, a sturdy, covered titanium crucible seems to be preferred for working with either elemental Sodium metal or Sodium Hydroxide. If you cannot obtain a titanium vessel, acceptable results can be had by using a crucible made from 1810 stainless steel. Generally, a small 5-inch or 6-inch diameter stainless steel cooking pot with a well-fitting stainless steel lid makes an acceptable vessel. Make sure to remove any plastic handles or knobs that may be present, and plug up any left-over holes with a stainless steelnut and bolt. Another caution - make sure the handle is not riveted on with aluminum rivets. The aluminum rivets will melt almost as soon as your crucible hits the fire (...don't ask me how I know this!) and should the aluminum metal make it's way into the lye - toxic compounds will be formed and your project will be ruined. Drill any aluminum rivets out and replace them with stainless steel nuts and bolts, or simply leave the handle off and plug up the holes with stainless hardware. Many inexpensive small cooking pots have an aluminum-filled base plate attached to the bottom of the pan to assist in evenly distributing the heat when used at normal cook stove temperatures. Try to avoid using this type of pot. When used as a crucible, the aluminum layer will melt and ooze out of the cracks around the bottom of the pot. While this may not seem all that problematic at first glance, keeping those blobs of melted aluminum from reacting with the lye solution just makes one more thing to have to deal with unnecessarily when you already have enough to keep you busy. If you are unsure of the composition of your crucible - do a dry run in the fire first and see how it reacts. Better to find out you've got a problem with an empty crucible, instead of a pot full of valuable prima materia. Heating the crucible to red heat will also remove any traces of oils, waxes or chemicals that may be present. Down to BusinessAside from the monetary savings, another big advantage to using lye is that it is a finely divided material, generally present as small beads or granules. The small grains mix more intimately with the materia than large, jaggedly-cut, hurriedly-arranged chunks of sodium metal. If you intend to do a burn using Copper or other metal, take a thin sheet (foil is best) of your metal about 5 inches square and hammer it out as thin as you can with a ball peen hammer. You may not notice much happening with metals that are harder and less malleable than gold, but hammer it out anyway - since you are putting a little of yourself and your intent into the Work this way. Next, using a sturdy pair of scissors, cut the hammered sheet into strips about 1/8th of an inch wide. Then take 3 or 4 strips at a time in hand and cut them off into the smallest flakes you can make. The flakes should be no larger than this letter "X."
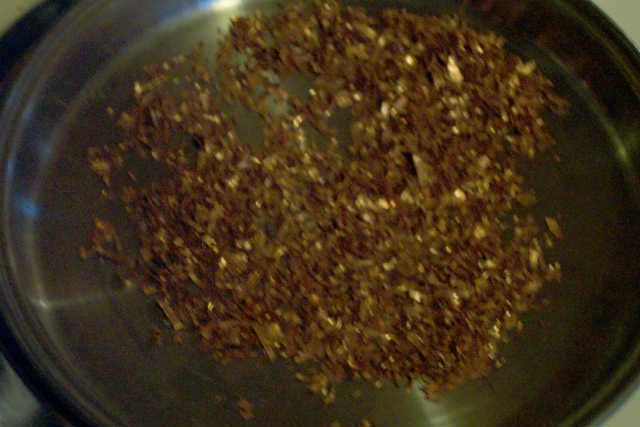
Copper flakes ready to mix with lye granules. If you are going to do a burn of black volcanic sand, put about 1/4 cup of your sand into your prepared crucible and place it on the stove at the very lowest heat setting, uncovered, for about 10-15 minutes to drive out any moisture. When you think the sand is dry enough, place the cover on the crucible and set it aside to cool. When the crucible is cool enough to hold in your hand, remove the top and add about 1 to 1-1/2 cups (8 to 12 oz.) of lye. Put the cover back on and shake thoroughly to mix the lye and the sand together well. For metal flakes, a swirling motion works best for this. Into the FireA good source of heat for the lye fusion process is a propane "turkey cooker." These are readily available (especially after the Thanksgiving holiday) from most discount, department or dollar stores for somewhere in the neighborhood of 40 dollars (US). WalMart and Sears Hardware stores often "blow them out" on clearance sales for as little as $14.99 per unit! Try to find one that is rated at least 145,000 BTU. A turkey cooker offers a distinct advantage over other types of propane burners in that it is already set up with an acceptable platform upon which to place the crucible. The author uses a large de-commissioned propane space heater sold by W.W. Grainger that produces 250,000 BTU of heat. It is a great big bear of a burner, good for outdoor use in cold climates, but it does not come with a ready-to-use platform for the crucible. You'll have to rig something up yourself.
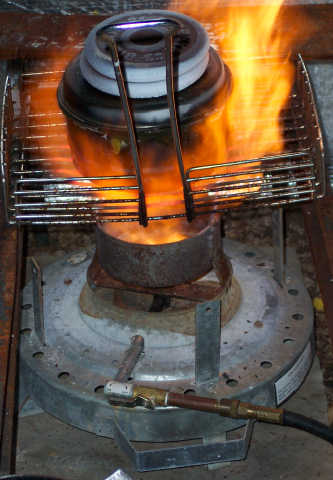
The author's "Big Bear" of a burner. Be advised: If you want to be able to attain cherry-red heat outdoors, even in very cold ambient temperatures, you are going to need a BIG burner. It is also a good idea to set up some sort of a wind-break around your burner. CBS blocks or bricks are the best bet, but wood may also be used if sufficiently insulated by facing it with foil-backed insulation or sheet metal on 1/4" standoffs.
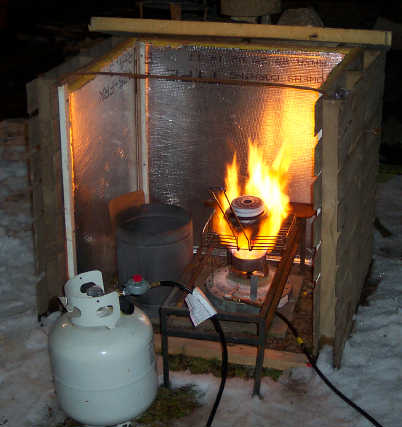
A suitable wind-break helps to conserve heat. A further aid to getting enough heat is a heat-concentrator or shroud. This can be made from a piece of sheet metal or a length of stovepipe. Place the concentrator around the crucible to further increase the heat on those c-o-l-d northern days.
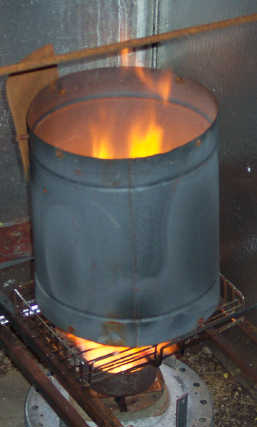
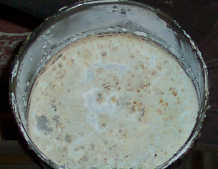
A sheet-metal heat-concentrating shroud. Place your crucible and its contents onto the burner platform and place a 2-3 lb. weight on the lid. A metal barbell weight works well for this. If nothing else, find a good-sized rock or a brick. Avoid using concrete, as concrete tends to "explode" when heated rapidly due to the expansion of trapped internal moisture. Try to get your crucible centered over the burner as best you can. Some re-positioning of the crucible may be necessary once you fire it up, so have some sort of implement ready. Fireplace tongs work nicely for this, and it also wouldn't hurt to have a good pair of welders gloves handy. Fire up the burner and try to get the crucible completely engulfed in the flame so it is heated as evenly as possible. There are generally no pyrotechnic flare-ups with lye, like you occasionally have with a sodium burn, but there are still plenty of toxic vapors coming off of the mixture so stay upwind of the burner. Ideally, your crucible should get red-hot, at least the lower 1/3 of it. Once the crucible reaches glowing red heat, time the burn for at least 30 minutes. You can let it go for an hour if you want to, but the author has obtained good results at 30 minutes with both volcanic sand and Copper metal. When you think your mixture has cooked sufficiently, cut the heat off and take a break. Bubble, bubble...Remove the weight from the lid of the crucible as soon as you turn off the flame - since this will usually take much longer to cool than the crucible itself and it's entire contents. When the crucible is cool to the touch, remove the lid. It may be necessary to tap the cover of the crucible gently around its circumference with a small hammer to get it to loosen up and come off. Remember people, this is highly caustic LYE - chunks of it may go flying around >>> ONE SPECK OF IT IN YOUR EYE WILL BLIND YOU FOR LIFE! <<< Always use safety goggles or safety glasses. Work near a sink and have a bucket of fresh water on hand to use for an emergency eye-rinse. A bottle of vinegar to neutralize any lye burns on the skin is also a good idea. The contents of the crucible should now look kind of like solidified oatmeal.
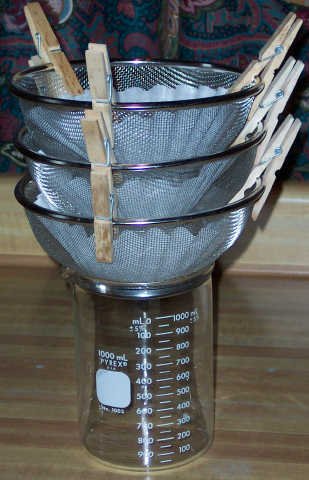
Inside the crucible after a burn. Unlike a sodium burn, the material in the pan is still very water soluble after a lye burn! Anyone who has ever spent a few hours with their hands stuck in a plastic bag, chipping and smashing chunks of caustic sodium-metal "cement" loose from the bottom of a steel pan will definitely appreciate this point. Set the crucible down into the bottom of a large plastic bucket and SLOWLY add distilled water to it, stirring with a large plastic or stainless-steel spoon. When no more of the burned material will dissolve into that batch of distilled water, dump the water out into another plastic bucket and add some more fresh distilled water. Continue this procedure until the crucible is empty. Pour the dissolved material, and any leftover sand, metal, or what-have-you into a 2 quart stainless-steel pot (or Pyrex casserole) with a well-fitting lid. Add more 1:8 lye solution [16 oz. lye to 1 gallon distilled water] if necessary to bring the level up to within an inch of the rim of the pot. Again, it is a good idea to put a weight on the lid to keep as much steam from escaping as possible. Bring the solution to a GENTLE ROLLING BOIL over a GAS flame, and boil for 4 - 6 hours, adding more pre-heated distilled water periodically as needed to keep the level constant. [Note: When a lye menstruum such as this begins to boil, it boils ALL AT ONCE, and it will immediately boil over if the flame is set anywhere above a bare minimum. Trust me - this makes a hell of a mess, not to mention the hazard to people, pets, etc. If you start out with a medium flame to "get it going" - STAY RIGHT THERE WITH IT UNTIL IT BEGINS TO BOIL and immediately reduce the flame to a minimum to keep it from boiling over. If you do not heed this advice, you will sorely wish that you had.] Filter TimeAllow the solution sufficient time to cool and settle. Unfortunately, this might take an entire day...or longer. If you have ever done anything that has anything at all to do with Alchemy, then you know it takes a lot of PATIENCE. Nothing will come of this procedure that will make anything happen in a hurry. We're not baking a cake here. This isn't moonshine we're brewing. In most cases, the effects of M-state materials take months and years to manifest, so WHAT'S YOUR HURRY? If you allow sufficient time for the material to settle, your menstruum will be almost crystal-clear and it will filter quite quickly and easily. If you rush it - you will clog your filter paper and it will wind up taking even longer to get the job done. The best method is to siphon the top liquid off of the settled solids using a length of vinyl tubing (like air tubing used with an aquarium). If, however, you are one of those people that just never got the hang of starting a siphon, you can simply use a ladle to scoop out the liquid slowly so as not to disturb the settled solids. Whichever method you choose, when the liquid level gets low, removing the last of it will be a little easier if you cant the vessel to one side by propping it up underneath one edge with something. The best method is of course is to vacuum filter the menstruum with a Buchner funnel and a 1 micron glass filter, however this is not absolutely necessary. Even if you plan to do a vacuum filtration, you will still need to pre-filter the material. Shown below is a method of filtering that has proven to work well either as a prelude to vacuum filtering or as an end in itself. Obtain some stainless steel strainers (try a dollar store) and stack 5 coffee filters into each of three strainers. Place 3 clothespins evenly spaced around the rim of the first strainer, and pre-wet the filters with distilled water. Repeat with the second strainer, then place the second strainer inside the first, resting it's clothespins directly on top of the first set of clothespins. Repeat with the third strainer. Some juggling of the clothespins may be necessary to get everything situated, but once everything is in place, the setup will remain stable throughout the procedure.
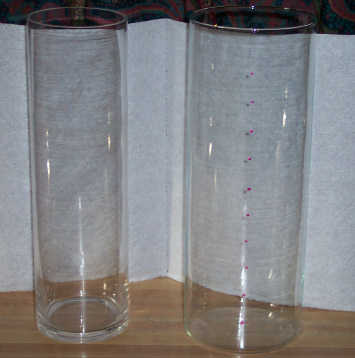
A handy setup for pre-filtering. If you do not have a large Pyrex beaker, find a suitable container like a wide-mouthed gallon jug or a large bowl and position the strainers up above it as best you can. Slowly add your menstruum until it all filters down into the container. After filtering, the liquid should be as clear as vodka. If it is not, repeat the procedure with fresh filters. (If your liquid is still cloudy after 30 coffee filters - there's something wrong with your eyes, or your filters!) Rock that pH!For this portion of the process it is best to use a pH meter with decent resolution, preferably one that has temperature compensation. Simple pH paper simply cannot successfully be used for this. Why, you ask? Because unless you have eyes like an oriental pearl sorter, it is impossible to discern a fraction of a pH point with pH paper, not to mention the fact that you will need about 200 pieces of pH paper every time that you do this. Practically every piece of lab equipment used in Alchemy can be fudged with kitchenware or other common items, but not the pH meter, sorry. If you are serious about alchemical Work, break down and buy a decent meter, and I don't mean one of those $39 specials suitable only for checking your salt-water aquarium. Get yourself a real pH meter. Probably the best-known source for pH meters is Hanna Instrument Co. and their most economical, yet still decent meter would be the HI8314. Assuming that you have a decent pH meter, put a sufficient quantity of your menstruum into a large beaker or other Pyrex glass container, position the meter probe(s) and begin stirring the solution with a glass rod or nylon spoon. Be sure the stirring tool is resistant to room-temperature acids and alkalis. Slowly drip in 20% - 30% HCl into the menstruum while constantly stirring. >>> Once again, remember...you are DRIPPING CORROSIVE ACID into CAUSTIC LYE. ONE DROPLET OF EITHER SPLASHED IN YOUR EYE WILL BLIND YOU. Always use proper eye protection. Work near a sink, and have a bucket of clean water available as an emergency rinse, and some vinegar to neutralize any lye burns on the skin. <<< The goal here is to adjust the pH slowly, lowering it by no more than .1 pH point per minute. Monitor the temperature of the solution while you are titrating it, and do not allow the temperature to go above 45 degrees Centigrade (about 100 F). If the temperature reaches 45 C, stop and let the solution cool. Go make a cup of tea or something. - remember, we're not in any hurry here. Bring the pH slowly down to 1.0 and stop. You may notice a characteristic effervescence of the menstruum just before this point - this is quite normal. If the temperature is still low enough, begin dripping in 1:8 lye solution, again while constantly stirring. This time, the goal is now to RAISE the pH by no more than .1 pH point per minute. As before, do not allow the solution to heat above 45 degrees C. When you get to about pH 7 or 8, depending on the temperature, you should see a white precipitate beginning to form. If you are working with copper or black volcanic sand, you can take the pH up to about 9.5 and stop. If you were working with Copper metal, look very closely at the color of the precipitate which forms. The precipitate MUST be white - any other color except white is no good. If you should happen to get a blue or green precipitate, re-dissolve it by once again dripping HCl into the menstruum slowly until the pH goes back down to 1.0 and try again. This time work much, much more slowly. The Fun PartAll that's left to do now is to wash (almost) all of the salt out of our precipitate. Find a large slender glass vessel shaped like a cylinder and pour the solution into it to settle. Cover it with plastic wrap to keep dust, bugs, etc., out of it. You will find that your precipitate will settle much faster if it is kept in the dark, so put some aluminum foil, or a brown paper grocery bag over your settling vessel while it falls. Department and dollar stores sometimes have large glass candle-holders that make excellent precipitate-settling cylinders. Some hold upwards of 2 liters of solution and they are very inexpensive, so you won't beat yourself up so bad when it slides through those lye-slippery fingers and goes crashing to the floor. An acceptable glass cylinder can also be made by removing the top portion of a glass bottle, but this will be left up to the resourcefulness of the individual.
Candle-holder cylinders, one with nail polish spots
every 250 ml. When the solution has settled completely - again, this may take a day or longer - pour or siphon off the top water until only precipitate remains in the cylinder and add roughly 3 times the volume of the precipitate of distilled water and let it settle again. When this has settled, taste a little bit of it with a plastic spoon. If it is still too salty for you, wash it again. If you plan to carry any of the solution anywhere by car, or send any of it to someone by mail, be sure to leave plenty of salt in it to protect it from x-rays and EMF from scanners, etc. |